User Registration in PHP with Login: Form with MySQL and Code Download
User login and registration is a basic requirement for any CMS applications. This is the initial work while starting a project. Application with user login authentication provides security by preventing anonymous access. There are various ways to enable authentication in our application like by enabling OAuth login or by implementing Single Sign-on (SSO) and similar other ways. In a previous tutorial, we have seen how to implement Google OAuth login and also about Facebook Open Authentication.
If you want to see my latest code for user registration and login with PHP, then the linked article has the downloadable source code.

This example includes both login and registration functionalities. I have used a MySQL database to store the registered members. The user registration will contain input to get the details from the user. On submitting this form, the form data are posted to PHP and stored in the database. The user password will be encrypted before storing it into the database. >User inputs are validated on the client-side before posting to the PHP code. When the user logged in with the valid credentials, then the user login state is maintained in a session and he will be allowed to proceed further.
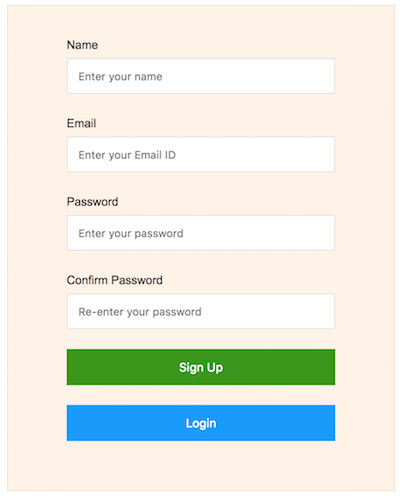
User Registration Form
This code is to show the signup form to the user. When the user submits the form with his details, the JavaScript function will be called to validate user input. After successful validation, the PHP code will read the posted form data to execute the database insert.
<?php
        if (! empty($response)) {
            ?>
<div id="response" class="<?php echo $response["type"]; ?>
    ">
    <?php echo $response["message"]; ?>
</div>
<?php
        }
        ?>
<form action="" method="POST" onsubmit="return signupvalidation()">
    <div class="row">
        <label>Name</label><span id="name_error"></span>
        <div>
            <input type="text" class="form-control" name="name"
                id="name" placeholder="Enter your name">

        </div>
    </div>

    <div class="row">
        <label>Email</label><span id="email_error"></span>
        <div>
            <input type="text" name="email" id="email"
                class="form-control" placeholder="Enter your Email ID">

        </div>
    </div>

    <div class="row">
        <label>Password</label><span id="password_error"></span>
        <div>
            <input type="Password" name="password" id="password"
                class="form-control" placeholder="Enter your password">

        </div>
    </div>

    <div class="row">
        <label>Confirm Password</label><span id="confirm_password_error"></span>
        <div>
            <input type="password" name="confirm_pasword"
                id="confirm_pasword" class="form-control"
                placeholder="Re-enter your password">

        </div>
    </div>

    <div class="row">
        <div align="center">
            <button type="submit" name="submit" class="btn signup">Sign
                Up</button>

        </div>
    </div>

<div class="row">
    <div>
        <a href="login.php"><button type="button" name="submit"
                class="btn login">Login</button></a>
    </div>
</div>

</form>
The JavaScript validation will take care of the mandatory fields’ non-empty check and also email format validation with regex pattern.
<script>
	function signupvalidation() {
		var name = document.getElementById('name').value;
		var email = document.getElementById('email').value;
		var password = document.getElementById('password').value;
		var confirm_pasword = document.getElementById('confirm_pasword').value;
		var emailRegex = /^[a-zA-Z0-9.!#$%&'*+/=?^_`{|}~-]+@[a-zA-Z0-9](?:[a-zA-Z0-9-]{0,61}[a-zA-Z0-9])?(?:\.[a-zA-Z0-9](?:[a-zA-Z0-9-]{0,61}[a-zA-Z0-9])?)*$/;

		var valid = true;

		if (name == "") {
			valid = false;
			document.getElementById('name_error').innerHTML = "required.";
		}

		if (email == "") {
			valid = false;
			document.getElementById('email_error').innerHTML = "required.";
		} else {
			if (!emailRegex.test(email)) {
				valid = false;
				document.getElementById('email_error').innerHTML = "invalid.";
			}
		}

		if (password == "") {
			valid = false;
			document.getElementById('password_error').innerHTML = "required.";
		}
		if (confirm_pasword == "") {
			valid = false;
			document.getElementById('confirm_password_error').innerHTML = "required.";
		}

		if (password != confirm_pasword) {
			valid = false;
			document.getElementById('confirm_password_error').innerHTML = "Both passwords must be same.";
		}

		return valid;
	}
</script>
This PHP code to create insert using the registration form data. After executing the database insert the success/error response will be sent to acknowledge the user.
<?php
if (isset($_POST["submit"])) {
    include_once 'dbConnect.php';

    $name = $_POST['name'];
    $email = $_POST['email'];
    $password = md5($_POST['password']);

    $database = new dbConnect();

    $db = $database->openConnection();
    $sql1 = "select name, email from tbl_registered_users where email='$email'";

    $user = $db->query($sql1);
    $result = $user->fetchAll();
    $_SESSION['emailname'] = $result[0]['email'];

    if (empty($result)) {
        $sql = "insert into tbl_registered_users (name,email, password) values('$name','$email','$password')";

        $db->exec($sql);

        $database->closeConnection();
        $response = array(
            "type" => "success",
            "message" => "You have registered successfully.<br/><a href='login.php'>Now Login</a>."
        );
    } else {
        $response = array(
            "type" => "error",
            "message" => "Email already in use."
        );
    }
}
?>
Login Authentication using PHP
The registered user can log in to the application via this login form. The login authentication is done by matching the login email and password with the registered user database. If a match found then the application will allow the user to proceed further. Otherwise, the login panel will acknowledge the user about the invalid attempt.
<form action="" method="POST" onsubmit="return loginvalidation();">
    <div class="row">
        <label>Email</label> <span id="email_error"></span>
        <div>
            <input type="text" name="email" id="email"
                class="form-control" placeholder="Enter your Email ID">
        </div>
    </div>
    <div class="row">
        <label>Password</label><span id="password_error"></span>
        <div>
            <input type="Password" name="password" id="password"
                class="form-control" placeholder="Enter your password">

        </div>
    </div>
    <div class="row">
        <div>
            <button type="submit" name="submit" class="btn login">Login</button>
        </div>
    </div>
    <div class="row">
        <div>
            <a href="index.php"><button type="button" name="submit"
                    class="btn signup">Signup</button></a>
        </div>
    </div>
</form>
The PHP code for validating the user login with the database is shown below. After a successful login, I redirect the user to the dashboard.php. The dashboard will show a welcome message by addressing the logged-in member. Also, there will be an option to log out of the current session.
<?php
session_start();
if (isset($_POST["submit"])) {
    include_once 'dbConnect.php';

    $email = $_POST['email'];
    $password = md5($_POST['password']);

    $database = new dbConnect();

    $db = $database->openConnection();

    $sql = "select * from tbl_registered_users where email = '$email' and password= '$password'";
    $user = $db->query($sql);
    $result = $user->fetchAll(PDO::FETCH_ASSOC);

    $id = $result[0]['id'];
    $name = $result[0]['name'];
    $email = $result[0]['email'];
    $_SESSION['name'] = $name;
    $_SESSION['id'] = $id;

    $database->closeConnection();
    header('location: dashboard.php');
}
?>
Leave Comment